Collage

n. A piece of art made by sticking various different materials, aka PHENOMENA Magazine
Department
server

server

How to disable direct access to a web site by ip address
Neither of above helped in my case - IP connection to http works as expected but https was redirecting to alphabetically first https virtual site. What was working witn nginx below 1.19.4 was to add null certificate to block: server { listen 80 default_server; listen [::]:80 default_server; listen 443 default_server; listen [::]:443 default_server; ssl_certificate /etc/ssl/null.crt; ssl_certificate_key /etc/ssl/null.key; server_name ""; return 444; }   Certificte can be generated with empty CN so you need no worry about fill it. sudo openssl req -x509 -newkey rsa:2048 -days 10000 -nodes -subj "/C=US/ST=Florida/L=XXXXX/O=Foo Inc./OU=IT/CN=X" -keyout null.key -out null.crt   Then http/https returns 444 (ERR_EMPTY_RESPONSE), in different configurations https returns ERR_HTTP2_PROTOCOL_ERROR with your null certificate which is also fine to show there is nothing there. For nginx 1.19.4 it is simpler. It introduced ssl_reject_handshake on | off (http://nginx.org/en/docs/http/ngx_http_ssl_module.html#ssl_reject_handshake) you can replace certificates 'stuff' with: server { listen 80 default_server; listen [::]:80 default_server; listen 443 default_server; listen [::]:443 default_server; ssl_reject_handshake on; server_name ""; return 444; }   And now you get http 444 (ERR_EMPTY_RESPONSE) and for https ERR_SSL_UNRECOGNIZED_NAME_ALERT. No null certificates are needed.   Ref. how to disable direct access to a web site by ip address I have a website on a VPS. The issue I am having is that when I enter the IP of the server, it links to the website. Even when entering mail.domain.com, it does the same thing. How do I disable t... https://stackoverflow.com/questions/29104943/how-to-disable-direct-access-to-a-web-site-by-ip-address OpenSSL: A problem with Field Name abbreviations? I am trying to create a new private key and CSR file for a colleague with some provided details: C = US S = Florida L = XXXXX O ... https://stackoverflow.com/questions/55541601/openssl-a-problem-with-field-name-abbreviations
server · Nov. 28, 2023, 9:14 p.m.
nginx ssl
How to easily convert utf8 tables to utf8mb4 in MySQL 5.5
From my guide How to support full Unicode in MySQL databases, here are the queries you can run to update the charset and collation of a database, a table, or a column:   For each database: ALTER DATABASE database_name CHARACTER SET = utf8mb4 COLLATE = utf8mb4_unicode_ci;   For each table: ALTER TABLE table_name CONVERT TO CHARACTER SET utf8mb4 COLLATE utf8mb4_unicode_ci;   For each column: ALTER TABLE table_name CHANGE column_name column_name VARCHAR(191) CHARACTER SET utf8mb4 COLLATE utf8mb4_unicode_ci;   (Don’t blindly copy-paste this! The exact statement depends on the column type, maximum length, and other properties. The above line is just an example for a VARCHAR column.) Note, however, that you cannot fully automate the conversion from utf8 to utf8mb4. As described in step 4 of the abovementioned guide, you’ll need to check the maximum length of columns and index keys, as the number you specify has a different meaning when utf8mb4 is used instead of utf8. Section 10.1.11 of the MySQL 5.5 Reference Manual has some more information on this.   How to easily convert utf8 tables to utf8mb4 in MySQL 5.5 I have a database which now needs to support 4 byte characters (Chinese). Luckily I already have MySQL 5.5 in production. So I would just like to make all collations which are utf8_bin to utf8mb4_... https://dba.stackexchange.com/questions/8239/how-to-easily-convert-utf8-tables-to-utf8mb4-in-mysql-5-5
server · Aug. 6, 2023, 8:52 a.m.
recv() failed (104: Connection reset by peer) while reading response header from upstream
LinkedIn sharing has not worked for me. So I checked a URL from LinkedIn’s Post Inspector.     A 400 error has occurred. I checked the server error log again. [error] 4993#4993: *22595 recv() failed (104: Connection reset by peer) while reading response header from upstream, client: 1.1.1.1, server: example.com, request: "GET / HTTP/1.1", upstream: "uwsgi://unix://www/webservice.sock:", host: "example.com", referrer: "url" This snippet is for future me. Most answers for this problem you'll see are related to PHP. This issue is related to the buffer size in the uWSGI. Probably your requests have a long query parameters and cookies.   First, I added the following code to nginx.conf: reset_timedout_connection on; keepalive_requests 1000; send_timeout 30; server_names_hash_max_size 2048; #access_log /var/log/nginx/access.log; access_log off; log_not_found off; but it still has not worked.   One setting that occasionally needs to be adjusted is UWSGI_BUFFER_SIZE. The default value is 4096. If you plan to receive relatively big requests, you'll need to change this parameter value. You can tune it up to 65535. I do it in my application config uwsgi ini file. ( basically ini file is in /etc/uwsgi/ ) buffer-size=32768   * If you want to show an OG image, then you have to resize the image to 1200 px, etc. My image was 4032x3024, and it didn't show up.   Now everything works fine. :)   Ref. uWSGI. recv() failed (104: Connection reset by peer) while reading response header from upstream / abstractkitchen.com abstractkitchen.com uWSGI. recv() failed (104: Connection reset by peer) while reading response header from upstream Posted by Dmitry Updated on December 04, 2022 python uwsgi error snippet nginx [error] 4993#4993: *22595 recv() failed (104: Connection re https://abstractkitchen.com/blog/recv-failed-connection-reset-by-peer/ How to manage uWSGI configuration - Divio Documentation Divio Documentation Contents Menu Expand Light mode Dark mode Auto light/dark mode Hide navigation sidebar Hide table of contents sidebar Toggle site navigation sidebar Divio Documentation Toggle Light / Dark / Auto color theme Toggle table of contents si https://docs.divio.com/en/latest/how-to/uwsgi-configuration/ https://yoast.com/help/linkedin-sharing-not-working/ uwsgi invalid request block size I am running uwsgi in emperor mode uwsgi --emperor /path/to/vassals/ --buffer-size=32768 and getting this error invalid request block size: 21327 (max 4096)...skip What to do? I also tried -b 32768. https://stackoverflow.com/questions/15878176/uwsgi-invalid-request-block-size Where do you create the ini file? (Uwsgi) my reference: https://docs.djangoproject.com/en/4.0/howto/deployment/wsgi/uwsgi/ my project name: 'mysite' my directories: I create 'uwsgi.ini'. then, I written in ini file. [uwsgi] chdir=/var/ww... https://stackoverflow.com/questions/70811918/where-do-you-create-the-ini-file-uwsgi  
server · June 26, 2023, 3:45 a.m.
python uwsgi nginx
How To Secure Nginx with Let's Encrypt on Ubuntu
Step 1. Installing Certbot # apt-get install letsencrypt or # apt-get install certbot   Step 2. Confirming Nginx’s Configuration To check, open the server block file for your domain using nano or your favorite text editor: # sudo nano /etc/nginx/sites-available/your_domain Find the existing server_name line. It should look like the following: ... server_name your_domain www.your_domain; ... If it does, exit your editor and move on to the next step.   Step 3. Obtaining an SSL Certificate # letsencrypt certonly --webroot --webroot-path=/home/myuser3/www -d your_domain.com -d www.your_domain.com * How to Solve Error 404 Not Found & How to Fix it Failed authorization procedure. your_domain.com (http-01): urn:ietf:params:acme:error:unauthorized :: The client lacks sufficient authorization :: 160.153.63.10: Invalid response from https://www.your_domain.com/.well-known/acme-challenge/ABCDE12345: 404, www.your_domain.com (http-01): urn:ietf:params:acme:error:unauthorized :: The client lacks sufficient authorization :: 160.153.63.10: Invalid response from https://www.your_domain.com/.well-known/acme-challenge/VWXYZ67890: 404 IMPORTANT NOTES: - The following errors were reported by the server: Domain: your_domain.com Type: unauthorized Detail: 160.153.63.10: Invalid response from https://www.your_domain.com/.well-known/acme-challenge/ABCDE12345: 404 Domain: www.your_domain.com Type: unauthorized Detail: 160.153.63.10: Invalid response from https://www.your_domain.com/.well-known/acme-challenge/VWXYZ67890: 404 To fix these errors, please make sure that your domain name was entered correctly and the DNS A/AAAA record(s) for that domain contain(s) the right IP address. Edit Nginx’s Configuration location /.well-known { alias /root/folder/$site_name/.well-known/$1; } * If successful, you will receive the following output: Saving debug log to /var/log/letsencrypt/letsencrypt.log Plugins selected: Authenticator webroot, Installer None Obtaining a new certificate Performing the following challenges: http-01 challenge for your_domain.com http-01 challenge for www.your_domain.com Using the webroot path /root/folder/your_domain for all unmatched domains. Waiting for verification... Cleaning up challenges Running deploy-hook command: systemctl reload nginx IMPORTANT NOTES: - Congratulations! Your certificate and chain have been saved at: /etc/letsencrypt/live/your_domain/fullchain.pem Your key file has been saved at: /etc/letsencrypt/live/your_domain/privkey.pem Your cert will expire on 2023-09-18. To obtain a new or tweaked version of this certificate in the future, simply run certbot again. To non-interactively renew *all* of your certificates, run "certbot renew" - If you like Certbot, please consider supporting our work by: Donating to ISRG / Let's Encrypt: https://letsencrypt.org/donate Donating to EFF: https://eff.org/donate-le   Step 4. Edit Nginx’s Configuration Add this block: #ssl beginning ssl on; ssl_certificate /etc/letsencrypt/live/your_domain/fullchain.pem; ssl_certificate_key /etc/letsencrypt/live/your_domain/privkey.pem; ssl_dhparam /etc/ssl/certs/dhparam.pem; #ssl end   Ref. How To Secure Nginx with Let's Encrypt on Ubuntu 18.04 | DigitalOcean New! Premium CPU-Optimized Droplets are now available. Learn more ->We're hiringBlogDocsGet SupportContact SalesProductsFeatured ProductsDropletsScalable virtual machinesKubernetesManaged Kubernetes clustersCloudwaysManaged cloud hostingApp PlatformGet ap https://www.digitalocean.com/community/tutorials/how-to-secure-nginx-with-let-s-encrypt-on-ubuntu-18-04 Let’s Encrypt: How to Automatically Restart Nginx With Certbot – Arnon on Technology close search homeHome chatContact Me Categories labelGenerallabelHow-To GuideslabelMetalabelNewslabelOp-EdlabelServer Logs Explained Archives folderDecember 2021 folderJune 2021 folderMarch 2021 folderJanuary 2021 folderDecember 2020 folderOctober 2020 fo https://blog.arnonerba.com/2019/01/lets-encrypt-how-to-automatically-restart-nginx-with-certbot [Ubuntu] Let’s Encrypt 를 사용하여 무료로 SSL 사이트를 구축하는 방법 웹은 계속 발전하고 있으며, 여러 새로운 기술이 끊임 없이 등장하고 있다. 이 글에서는 웹 기술 중 하나인 SSL (Secure Socket Layer) 에 대해서 이야기 해 보고자 한다. < 그림 : OSI Model 에서 SSL 의 위치 >   정확히 말해서 SSL 은 전송계층과 (Transport Layer) 응용계층 (App… https://blog.lael.be/post/5107  
server · June 22, 2023, 11:33 p.m.
nginx Let’s Encrypt
How do I determine the total size of a directory (folder) from the command line?
The command du "summarizes disk usage of each FILE, recursively for directories," e.g., du -hs /path/to/directory -h is to get the numbers "human readable", e.g. get 140M instead of 143260 (size in KBytes) -s is for summary (otherwise you'll get not only the size of the folder but also for everything in the folder separately) As you're using -h you can sort the human readable values using du -h | sort -h The -h flag on sort will consider "Human Readable" size values. If want to avoid recursively listing all files and directories, you can supply the --max-depth parameter to limit how many items are displayed. Most commonly, --max-depth=1 du -h --max-depth=1 /path/to/directory   How do I determine the total size of a directory (folder) from the command line? Is there a simple command to display the total aggregate size (disk usage) of all files in a directory (folder)? I have tried these, and they don't do what I want: ls -l, which only displays the ... https://askubuntu.com/questions/1224/how-do-i-determine-the-total-size-of-a-directory-folder-from-the-command-line  
server · Feb. 7, 2023, 11:44 p.m.
linux Ubuntu filesystem
Run multiple Elasticsearch instances on one server using Docker
<Without docker-compose.yml> 1. Install Docker 2. Elasticsearch 7.16.2 2-1. Install Elasticsearch # docker pull docker.elastic.co/elasticsearch/elasticsearch:7.16.2 2-2. Execute Elasticsearch # docker run -d -p 9200:9200 -p 9300:9300 --name es_x -e "discovery.type=single-node" -e "xpack.security.enabled=false" -e ES_JAVA_OPTS="-Xms200m -Xmx200m" docker.elastic.co/elasticsearch/elasticsearch:7.16.2 8fd1161fed14b8e048e0f929a37cfacbab56371dc4c2b134602469c321cc0421 2-3. Check Execution # docker ps CONTAINER ID IMAGE COMMAND CREATED STATUS PORTS NAMES 8fd1161fed14 docker.elastic.co/elasticsearch/elasticsearch:7.16.2 "/bin/tini -- /usr/l…" 45 seconds ago Up 43 seconds 0.0.0.0:9200->9200/tcp, 0.0.0.0:9300->9300/tcp es_x 2-4. Check your Elasticsearch settings # docker exec -i -t es_x cat /usr/share/elasticsearch/config/elasticsearch.yml cluster.name: "docker-cluster" network.host: 0.0.0.0 2-5. Stop # docker stop es_x es_x   <With docker-compose.yml> 1. See up to and including Item 2-1. 2. docker-compose.yml version: '3.6' services: elasticsearch: image: 'docker.elastic.co/elasticsearch/elasticsearch:7.16.2' container_name: es_a ports: - 9200:9200 environment: - node.name="es_a" - cluster.name="es-docker-cluster" - bootstrap.memory_lock=true - discovery.type=single-node #- "ES_JAVA_OPTS=-Xms200m -Xmx200m" volumes: - ./esdata:/usr/share/elasticsearch/data - ./eslog:/usr/share/elasticsearch/log ulimits: memlock: soft: -1 hard: -1 networks: - elastic deploy: resources: limits: memory: 1GB # Use at most 50 MB of RAM elasticsearch2: image: 'docker.elastic.co/elasticsearch/elasticsearch:7.16.2' container_name: es_b ports: - 9201:9200 environment: - node.name="es_b" - cluster.name="es-docker-cluster2" - bootstrap.memory_lock=true - discovery.type=single-node #- "ES_JAVA_OPTS=-Xms200m -Xmx200m" volumes: - ./esdata2:/usr/share/elasticsearch/data - ./eslog2:/usr/share/elasticsearch/log ulimits: memlock: soft: -1 hard: -1 networks: - elastic2 deploy: resources: limits: memory: 1GB # Use at most 50 MB of RAM volumes: esdata: driver: local driver_opts: o: bind type: none #device: /data esdata2: driver: local driver_opts: o: bind type: none #device: /data2 eslog: driver: local eslog2: driver: local networks: elastic: driver: bridge elastic2: driver: bridge # docker-compose -f docker-compose.yml up -d # docker-compose -f docker-compose.yml stop # docker-compose -f docker-compose.yml rm 3. Result # docker-compose -f docker-compose.yml up -d [+] Running 2/2 - Container es_a Started 2.1s - Container es_b Started # docker-compose -f docker-compose.yml stop [+] Running 2/2 - Container es_a Stopped 1.2s - Container es_b Stopped 3-1. 9200 { "name" : "\"es_a\"", "cluster_name" : "\"es-docker-cluster\"", "cluster_uuid" : "KwFTIgGCT7e8ZDNJIau6Jw", "version" : { "number" : "7.16.2", "build_flavor" : "default", "build_type" : "docker", "build_hash" : "2b937c44140b6559905130a8650c64dbd0879cfb", "build_date" : "2021-12-18T19:42:46.604893745Z", "build_snapshot" : false, "lucene_version" : "8.10.1", "minimum_wire_compatibility_version" : "6.8.0", "minimum_index_compatibility_version" : "6.0.0-beta1" }, "tagline" : "You Know, for Search" } 3-2. 9201 { "name" : "\"es_b\"", "cluster_name" : "\"es-docker-cluster2\"", "cluster_uuid" : "MZhKEnPuTdu5iNoatWOnQA", "version" : { "number" : "7.16.2", "build_flavor" : "default", "build_type" : "docker", "build_hash" : "2b937c44140b6559905130a8650c64dbd0879cfb", "build_date" : "2021-12-18T19:42:46.604893745Z", "build_snapshot" : false, "lucene_version" : "8.10.1", "minimum_wire_compatibility_version" : "6.8.0", "minimum_index_compatibility_version" : "6.0.0-beta1" }, "tagline" : "You Know, for Search" }   * If error raised 'Custom Analyzer [nori_korean] failed to find tokenizer under name [nori_tokenizer]' Install Korean (nori) Analysis Plugin # sudo bin/elasticsearch-plugin install analysis-nori The plugin must be installed on every node in the cluster, and each node must be restarted after installation.   * Cannot bind to some ports due to permission denied Run as admin: net stop winnat net start winnat   Ref. Docker bind elasticsearch volume in app folder I have the following docker-compose file : version: "3.3" services: elasticsearch: image: docker.elastic.co/elasticsearch/elasticsearch:6.1.1 volumes: - esdata:/usr/share/ https://stackoverflow.com/questions/52373356/docker-bind-elasticsearch-volume-in-app-folder Docker, running multiple container (elasticsearch) I'm running one elasticsearch with version: '3' services: elasticsearch: build: context: . dockerfile: ./compose/elasticsearch/Dockerfile args: - VERSION=${VERSION} - M... https://stackoverflow.com/questions/59500443/docker-running-multiple-container-elasticsearch Enable Hyper-V on Windows 10 Install Hyper-V on Windows 10 https://learn.microsoft.com/en-us/virtualization/hyper-v-on-windows/quick-start/enable-hyper-v ElasticSearch on docker - 2nd instance kills the first instance I'm trying to run multiple versions of ElasticSearch at the same time, should be easy. Here are my commands: docker run -d --rm -p 9250:9200 -p 9350:9300 --name es_5_3_3_integration -e "xpack.sec... https://stackoverflow.com/questions/47540547/elasticsearch-on-docker-2nd-instance-kills-the-first-instance ElasticSearch - cannot run two es docker containers at the same time ElasticSearch - cannot run two es docker containers at the same time I'm trying to run 2 services of ElasticSearch using docker-compose.yaml Every time I run docker-compose up -d only one service is https://stackoverflow.com/questions/72273655/elasticsearch-cannot-run-two-es-docker-containers-at-the-same-time Cannot bind to some ports due to permission denied For the last 3 months or so I'm having random errors where I can't bind a specific port where our Identity server is running on my local development workstation. At first I thought it's my broken m... https://stackoverflow.com/questions/48478869/cannot-bind-to-some-ports-due-to-permission-denied [Windows 10] Docker 설치 완벽 가이드(Home 포함) Docker는 경량 가상화 기술인 리눅스 컨테이너 도구입니다. Windows 10 Home과 Pro에서도 몇 가지 설정을 통해 Docker Desktop으로 리눅스 컨테이너를 사용할 수 있습니다. 이 글에서는 Windows 10에서 Docker Desktop을 설치하는 방법을 총 정리합니다. https://www.lainyzine.com/ko/article/a-complete-guide-to-how-to-install-docker-desktop-on-windows-10/ 윈도우10 WSL2 설치하기, WSL2 우분투 설치하기 WSL이란? Linux용 Windows 하위 시스템을 사용하면 개발자가 기존 가상 머신의 오버헤드 또는 듀얼 부팅 설정 없이 대부분의 명령줄 도구, 유틸리티 및 애플리케이션을 비롯한 GNU/Linux 환경을 수정하지 않고 Windows에서 직접 실행할 수 있습니다. WSL2와 WSL1 비교 WSL 2는 Windows 10, 버전 1903, 빌드 18362 이상에서만 사용할 수 있습니다. 윈도우10에서 WSL2 설치해서 우분투 리눅스를 이용해보자 1. 윈 https://gaesae.com/161 Docker 기반의 Elasticsearch 설치 및 실행 본 문서에서는 Docker 환경에서 Elasticsearch 7.9 버전을 설치하고 실행하는 방법에 대해서 설명하고 있습니다. https://jinhokwon.github.io/devops/elasticsearch/elasticsearch-docker/ Korean (nori) Analysis Plugin | Elasticsearch Plugins and Integrations [6.4] | Elastic IMPORTANT: No additional bug fixes or documentation updates will be released for this version. For the latest information, see the current release documentation. Elastic Docs› Elasticsearch Plugins and Integrations [6.4]› Analysis Plugins « kuromoji_numbe https://www.elastic.co/guide/en/elasticsearch/plugins/6.4/analysis-nori.html#analysis-nori-install  
server · Feb. 7, 2023, 9:33 a.m.
elasticsearch docker
Set up minimal security for Elasticsearch
* Please refer to this.  Set up minimal security for Elasticsearch | Elasticsearch Guide [7.16] | Elastic IMPORTANT: No additional bug fixes or documentation updates will be released for this version. For the latest information, see the current release documentation. Elastic Docs› Elasticsearch Guide [7.16]› Secure the Elastic Stack› Configure security for th https://www.elastic.co/guide/en/elasticsearch/reference/7.16/security-minimal-setup.html   * Django setup elasticsearch client with password auth You can pass the elasticsearch URL as from urllib.parse import quote_plus as urlquote elk_base_url = 'elasticsearch://{user_name}:{password}@{host_ip}:{host_port}' elastic_search_url = elk_base_url.format(user_name='my_username', password=urlquote('mysecret_password'), # password may contain special characters host_ip='my-elastic-host-ip', host_port=9200) ELASTICSEARCH_DSL = { 'default': { 'hosts': [elastic_search_url] }, }  
server · Feb. 6, 2023, 5:59 a.m.
elasticsearch
Can I run multiple Elasticsearch instances in one server?
  Yes and I did that recently with my laptop for experimentation with things that I would like to do with ES Cluster. This setup simplifies my environment, instead of using docker or using multiple machines/VMs/EC2 instances. You can download and use the .tar.gz file recommended above, and then you can do one of the following options option 1 - untar the file into two directories: es-01, es-02 then update the config file in each node option 2 - untar the file into one directory: es-instance, copy the config directory to another location with something like path/to/es-01/config, path/to/es-02/config then create a script to launch elasticsearch from the same binary location (which is es-instance) but use different config location (one for es-01/config, one for es-02/config) You need to update the following parameters in config/elasticsearch.yml file to separate one node from the other. cluster.name node.name path.data path.logs http.port   Can I run multiple Elasticsearch instances in one server? Can I run multiple Elasticsearch instances in one server? -If yes, How can I install 2 Elasticsearch instances in a single Linux server. I am aware if we use "yum install" will be installed without any issue. Thanks in Advance https://discuss.elastic.co/t/can-i-run-multiple-elasticsearch-instances-in-one-server/321230 how to run multiple instances of elasticsearch on one host I have several machines each with 128 GB of ram, each host is running a single instance of Elasticsearch. I would like to run another data node on each host and allocate around 30 GB to the jvm he... https://stackoverflow.com/questions/28482449/how-to-run-multiple-instances-of-elasticsearch-on-one-host   You need to prepare two elasticsearch.yml config files to configure settings accordingly and specify these files when startup up the two nodes. /elasticsearch/config/elasticsearch.yml /elasticsearch/config2/elasticsearch.yml /elasticsearch/config2/elasticsearch.yml cluster.name: trinitarian node.name: node-2 path.data: /path/to/data path.logs: path/to/logs network.host: 127.0.0.1 network.bind_host: 127.0.0.1 network.publish_host: 127.0.0.1 http.port: 9500   Linux Assuming your rpm or deb created an init.d script, to start a second node on the same machine do as follows: cd /etc/init.d cp --preserve elasticsearch elasticsearch2 Edit elasticsearch2 script: change # elasticsearch to # elasticsearch2 add node="2" after line prog="elasticsearch" change pidfile=/var/run/elasticsearch/${prog}.pid to pidfile=/var/run/elasticsearch/${prog}${node}.pid change lockfile=/var/lock/subsys/$prog to lockfile=/var/lock/subsys/$prog$node change echo -n $"Starting $prog: " to echo -n $"Starting $prog: (node $node)" change echo -n $"Stopping $prog: " to echo -n $"Stopping $prog: (node $node)" Save the file. Execute chkconfig --add elasticsearch2 service elasticsearch2 start I also had to add -Des.config=<path-to-second-config-files> to get it working   Run multiple elasticsearch nodes as a service on one Ubuntu-Server I have a server running Ubuntu 14.04 with 220 GB of ram on which I'd like to run elasticsearch. According to the documentation, one node should not have more than 32 GB of RAM, so I guess I have to... https://stackoverflow.com/questions/26162690/run-multiple-elasticsearch-nodes-as-a-service-on-one-ubuntu-server   Windows /elasticsearch/bin/elasticsearch-env2.bat if not defined ES_PATH_CONF ( set ES_PATH_CONF=!ES_HOME!\config2 ) /elasticsearch/bin/elasticsearch2.bat CALL "%~dp0elasticsearch-env2.bat" || exit /b 1   Check this: http://localhost:9200/ { "name" : "BEAST", "cluster_name" : "elasticsearch", "cluster_uuid" : "EVBl4ttGSWKP8MJJMivMCg", "version" : { "number" : "7.16.2", "build_flavor" : "default", "build_type" : "zip", "build_hash" : "2b937c44140b6559905130a8650c64dbd0879cfb", "build_date" : "2021-12-18T19:42:46.604893745Z", "build_snapshot" : false, "lucene_version" : "8.10.1", "minimum_wire_compatibility_version" : "6.8.0", "minimum_index_compatibility_version" : "6.0.0-beta1" }, "tagline" : "You Know, for Search" } http://localhost:9500/ { "name" : "node-2", "cluster_name" : "trinitarian", "cluster_uuid" : "QRUfSRYISH-20jU7x9yxog", "version" : { "number" : "7.16.2", "build_flavor" : "default", "build_type" : "zip", "build_hash" : "2b937c44140b6559905130a8650c64dbd0879cfb", "build_date" : "2021-12-18T19:42:46.604893745Z", "build_snapshot" : false, "lucene_version" : "8.10.1", "minimum_wire_compatibility_version" : "6.8.0", "minimum_index_compatibility_version" : "6.0.0-beta1" }, "tagline" : "You Know, for Search" }   Rebuild index: PS E:\pythonProjects\trinitarian\test> python manage.py search_index --rebuild --model xxx Are you sure you want to delete the 'board' indexes? [y/N]: y Deleting index 'board' Creating index 'board' Indexing 26 'Board' objects PS E:\pythonProjects\trinitarian\test>   Test with this code (test.py): import elasticsearch elastic = elasticsearch.Elasticsearch(hosts=["localhost:9200"]) indices = elastic.indices.get_alias().keys() print(indices) elastic2 = elasticsearch.Elasticsearch(hosts=["localhost:9500"]) indices2 = elastic2.indices.get_alias().keys() print(indices2)   Result: E:\pythonProjects\trinitarian\venv\Scripts\python.exe E:/pythonProjects/trinitarian/test/app/test.py dict_keys(['a', 'b', 'c', 'board']) dict_keys(['board']) Process finished with exit code 0  
server · Feb. 6, 2023, 4:18 a.m.
elasticsearch
Changing Tomcat's Default Session ID (JSESSIONID)
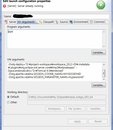
You can pass it as a parameter when starting the server. -Dorg.apache.catalina.SESSION_COOKIE_NAME=MYJSESSIONID -Dorg.apache.catalina.SESSION_PARAMETER_NAME=myjsessionid   * Eclipse Double click server - Open launch configuration  
server · Feb. 3, 2023, 6:47 a.m.
tomcat
Remove Trailing Slash in NGINX
Sometimes NGINX may show trailing slash in website URLs. Here’s how to remove trailing slash in NGINX to make your URLs look more intuitive.   Remove trailing slash in NGINX Here are the steps to remove trailing slash in NGINX.   1. Open NGINX configuration file Open terminal and run the following command to open NGINX server configuration file. $ sudo vi /etc/nginx/nginx.conf If you have configured separate virtual hosts for your website (e.g www.example.com), such as /etc/nginx/sites-enabled/website.conf then open its configuration with the following command $ sudo vi /etc/nginx/sites-enabled/website.conf 2. Remove trailing slash Add the following rewrite rule in server block as shown in bold. Replace example.com below with your domain name server { listen 80; server_name example.com; rewrite ^/(.*)/$ /$1 permanent; } In the above code, the rewrite statement will redirect all URLs to those without trailing slash. If you want to remove trailing slash from only a specific URL (e.g /product/) then update the rewrite statement as shown below. server { listen 80; server_name mydomain.com; rewrite ^/product/$ /product permanent; }   * You can also use this method. Remove the trailing slash from all paths except mypath. location ~ ^/mypath(.*) { try_files $uri @tomcat; } location ~ (?<no_slash>.*)/$ { return 301 $no_slash; } ... location / { try_files $uri @tomcat; } location @tomcat { ... }   3. Restart NGINX Server Run the following command to check syntax of your updated config file. $ sudo nginx -t If there are no errors, run the following command to restart NGINX server. $ sudo service nginx reload #debian/ubuntu $ systemctl restart nginx #redhat/centos  
server · Jan. 29, 2023, 9:54 p.m.
nginx
How to change where a symlink points
files is a symbolic link to /media/files/tb-prod/files. When you access files or anything inside it, you'll really access the path under /media. Symbolic links are made and updated using the ln command. This link could have been made with: ln -s /media/files/tb-prod/files files -s means to make a symbolic link. To update a link, either delete the link and create it as above, or use the -f option to ln as well. If you are linking to a folder, you should include the -n option: ln -sfn /a/new/path files This will replace the link with a new one pointing at /a/new/path. The -n option is necessary when linking to a different target folder to avoid creating a sub-folder inside that symbolic link and instead replace the symbolic link completely. e.g. contact@me:/mnt/webdav$ ls a1  a2  a3  a4  a5  a6 contact@me:/mnt/webdav$ ln -sfn /mnt/a2/XYZ a2 contact@me:/mnt/webdav$ ls a1  a2  a3  a4  a5  a6 contact@me:/mnt/webdav$ https://unix.stackexchange.com/questions/151999/how-to-change-where-a-symlink-points
server · Jan. 12, 2023, 9:08 a.m.
Ubuntu linux
ubuntu 하드디스크 마운트
현재 시스템에 연결된 디스크 목록을 확인 contact@me:~$ sudo fdisk -l 추가로 연결한 하드가 있다면 아래처럼 뜸 (파티션을 나누지 않은 상태) Disk /dev/sdd: 9.1 TiB, 10000831348736 bytes, 19532873728 sectors Units: sectors of 1 * 512 = 512 bytes Sector size (logical/physical): 512 bytes / 4096 bytes I/O size (minimum/optimal): 4096 bytes / 4096 bytes 외장하드를 연결했다면 아래처럼 뜸  The backup GPT table is corrupt, but the primary appears OK, so that will be used. Disk /dev/sdd: 3.7 TiB, 4000787029504 bytes, 7814037167 sectors Units: sectors of 1 * 512 = 512 bytes Sector size (logical/physical): 512 bytes / 4096 bytes I/O size (minimum/optimal): 4096 bytes / 4096 bytes Disklabel type: gpt Disk identifier: 9DB1508D-F261-47ED-BEB0-5AF9974A311C Device Start End Sectors Size Type /dev/sdd1 34 262177 262144 128M Microsoft reserved /dev/sdd2 264192 7814035455 7813771264 3.7T Microsoft basic data Partition 1 does not start on physical sector boundary. 4TB와 같이 용량이 크면 GPT 방식으로 파티션을 나누게 되는데 그러한 경우 아래 명령어 입력 contact@me:~$ sudo parted -l 파티션 나누는 자세한 방법은 생략 마운트 전에 해당영역을 포맷 contact@me:~$ sudo mkfs.ext4 /dev/sda1 mke2fs 1.44.1 (24-Mar-2018) /dev/sda1 contains a ntfs file system Proceed anyway? (y,N) y Creating filesystem with 1220804352 4k blocks and 152600576 inodes Filesystem UUID: 9DB1508D-F261-47ED-BEB0-5AF9974A311C Superblock backups stored on blocks: 32768, 98304, 163840, 229376, 294912, 819200, 884736, 1605632, 2654208, 4096000, 7962624, 11239424, 20480000, 23887872, 71663616, 78675968, 102400000, 214990848, 512000000, 550731776, 644972544 Allocating group tables: done Writing inode tables: done Creating journal (262144 blocks): done Writing superblocks and filesystem accounting information: done contact@me:~$ 포맷하면 UUID가 바뀜 * ntfs 포맷 contact@me:~$ sudo mkntfs -f /dev/sdc1 다음 명령으로 연결된 하드디스크의 UUID 검색 contact@me:~$ ls -l /dev/disk/by-uuid 합계 0 lrwxrwxrwx 1 root root 10 11월 4 15:38 9DB1508D-F261-47ED-BEB0-5AF9974A311C -> ../../sda1 lrwxrwxrwx 1 root root 10 11월 4 15:38 9DB1508D-F261-47ED-BEB0-5AF9974A311C -> ../../sda2 마운트 시도했지만 아래와같이 나온다면 contact@me:~$ sudo mount -t ntfs-3g /dev/sdd2 /mpoint/x1 Mount is denied because the NTFS volume is already exclusively opened. The volume may be already mounted, or another software may use it which could be identified for example by the help of the 'fuser' command. 연결후 이미 자동으로 마운트되어있던 상태였기에 기존 마운트 해제 contact@me:~$ sudo eject /dev/sdd2 다시 시도하면 정상적으로 된다. contact@me:~$ sudo mount -t ntfs-3g /dev/sdd2 /mpoint/x1 /dev/sdd2 : 아까 sudo fdisk -l 명령어 쳤을 때 나온, Device Boot /mpoint/x1 : 하나 생성한 디렉터리 경로 * fdisk로 확인했을때 아래처럼 나왔다면 /dev/sda4  1161216 976771071 975609856 465.2G Linux filesystem ext4 포맷방식은 아래 명령으로 마운트 contact@me:~$ sudo mount -t ext4 /dev/sda4 /경로/hdd 또는 fstab에 설정 후 재부팅없이 마운트 fstab 백업 후 수정 contact@me:~$ sudo cp /etc/fstab /etc/fstab.bak contact@me:~$ sudo vi /etc/fstab UUID번호 / 마운트 위치 / 파일 시스템 종류 / 옵션 / 덤프 / 패스 - file system : 위에서 확인한 UUID - mount point : 자동으로 하드디스크를 마운트할 위치 - type : 파일 시스템의 종류. 보통은 ext4 / fat 포맷이면 vfat / ntfs 포맷이면 ntfs - options : 특이 사항이 없다면 defaults - dump : 특이 사항이 없다면 0 - pass : 특이 사항이 없다면 0  contact@me:~$ sudo nano /etc/fstab UUID=9DB1508D-F261-47ED-BEB0-5AF9974A311C / ext4 errors=remount-ro 0 1 # /boot/efi was on /dev/sda1 during installation UUID=01X5-3AB1 /boot/efi vfat umask=0077 0 1 /swapfile none swap sw 0 0 UUID=9DB1508D-F261-47ED-BEB0-5AF9974A311C /folder/A ext4 defaults 0 0 UUID=9DB1508D-F261-47ED-BEB0-5AF9974A311C /folder/B ntfs defaults 0 0 contact@me:~$ sudo mount -a *ntfs 포맷이라면 다음 명령으로 설치 contact@me:~$ sudo apt-get install ntfs-3g 디스크 파일 시스템 명령 df -h를 사용하여 마운트에 성공했는지 확인 권한설정이 필요하면 다음명령 사용 contact@me:~$ sudo chmod 777 /folder/A 우분투(Ubuntu) 하드디스크 자동으로 마운트 하는 방법 :: BlankSpace (tistory.com) * unmount 와 eject 의 차이점 nautilus - What is the difference between "Unmount", "Eject", "Safely Remove Drive" and the eject icon? - Ask Ubuntu * 추가 하드디스크 마운트 방법 [Ubuntu] 추가 하드디스크 마운트 방법 (tistory.com) * 기타 자료 Mr. P Blog: [ Ubuntu ] 우분투 외장하드 마운트 (perdupper.blogspot.com) https://bluexmas.tistory.com/727 https://m.blog.naver.com/PostView.nhn?blogId=hymne&logNo=220977353373&proxyReferer=https:%2F%2Fwww.google.com%2F https://topis.me/109 https://blog.dalso.org/uncategorized/813 [Linux] 리눅스 파티션 및 마운트 [참고 및 출처 사이트] 더보기 이론, 그림 - https://itguava.tistory.com/100 실습, 그림 - https://m.blog.naver.com/haejoon90/220749495797 1. 리눅스 파티션 기본 정보 [파티셔닝] 하나의 물리 저장장치를 시스템 내부에서 여러 디스크 공간으로 나누는 작업 Primary Partition(주 영역 파티션) 물리적 파티션 최대 4개까지의 공간으로 나눌 수 있다.(Extended Partit https://kindongsy.tistory.com/35
server · Jan. 12, 2023, 8:19 a.m.
Ubuntu mount
  • 1 (current)
  • 2